Showing posts with label DIY. Show all posts

Saturday, February 13, 2016

DIY: Valentine's Day Cards

Want to make a thoughtful handmade Valentine's Day card for someone special (or you waited till the last minute and there are zero cards left at the store?) We have a fun and easy tutorial for you today!


Materials needed:
Cardstock - folded in half
Heart cut out of a piece of paper
Embroidery needle
Embroidery floss in your choice of color (or go crazy with several!)

  1. Take your heart cutout and trace it lightly on the front of your card - use a pencil for this part
  2. Using your embroidery needle poke holes around the heart tracing - be sure to space them out. For the heart on the left you will also need to poke a hole in the center of the heart.
  3. Once all the holes have been made, erase the pencil tracing. Select your embroidery floss color.
  4. Starting from the top of the heart start making big stitches from each hole to the center.
  5. Keep working your way around the heart. You can change colors part way through too.
  6. Once complete, tie a knot on the back side of the card to secure the floss and write a message of your choice!
Instead of making stitches through the center you can randomly make stitches all around the hear for a more abstract look, or do lines straight across for a clean look.

Happy Valentine's Day!


Monday, June 30, 2014

DIY: patriotic pinwheels for a sparkly Fourth of July

We've got something festive and sparkly just in time for your Fourth of July. Katrina of Ma Joie Press put together this great DIY. These make great party favors and decorations. Katrina added some to a bouquet of flowers for a holiday centerpiece, and it's adorable. Have a fun, safe and crafty Fourth!


1. What you need: 4.25" cardstock or scrapbook patterned paper squares, flat tacks, chopsticks, scissors, hot glue gun, hole punch, paint brush, glitter, and Elmer's glue.

If you love the paper design in the photos, Katrina was kind enough to share! Here is a letter-size PDF for easy printing. Print one side, then turn it over and print the back.

2. Cut from each corner to about two-thirds to the center of the square.

3. Put a dot of hot glue in the center of the square, and fold a point to the center. Continue dotting the glue and folding until you have a pinwheel.

4. Use your hole punch to make a hole in the center of the pinwheel, right through the dried hot glue.

5. Paint the edges of the pinwheel with Elmer's glue. Add glitter.

6. After the glue is dry, use a tack to secure the pinwheel to a chopstick. Careful not to push it in too tightly or the pinwheel won't spin.

Enjoy!

Wednesday, May 21, 2014

Etsy Dallas on The Broadcast: DIY Repurposing Picture Frames

Karen from Pinwheel Fair and Kathy from Kathleen Care Jewelry joined the hosts of The Broadcast to show off beautiful ways to recycle your old picture frames. 


Karen makes all kinds of gorgeous chalkboards, pushpins, and pillows in her Etsy shop. We are so happy she shared some of her talent and creative skills with us on the show today and gave us all the details for her Framed Magnet Board. 
Framed Magnet Board:

Supplies:
- Frame
- Sheet metal & tin snips (Home Depot or Loews)
- Ruler & sharpie
- Spray Paint
- Decorative paper or fabric
- Mod Podge & sponge brush
- Foam core
- Duck tape
- Utility knife & cutting mat
- Magnets
1. Remove glass, frame backing and spray paint the frame the color of choice - for best adhesion, lightly sand and prime first.
2. Measure inside of frame from the back - this will be your sheet metal dimensions. If your frame has a glass insert, simply use it as
an easy template to draw onto your sheet metal. Be careful - the sides will be SHARP!
3. "Paint" a thin layer of Mod Podge on to your sheet metal insert and smooth out your decorative paper/fabric carefully removing any air bubbles.  (Don't worry about the overage yet...)
4. Let dry overnight.
5. Cut off paper or fabric edges using your utility knife & a cutting mat to protect work surfaces. 
6. Carefully place your steel insert back into your frame.
7. Cut layers of foam core board to fit, until the frame back is level to the frame.
8. Seal all edges with your duck tape to complete!
Kathy from Kathleen Care Jewelry designs and hand crafts beautiful jewelry. How lovely it would be to make one or two of her display boards to organize all of your jewelry. Here's all the details Kathy shared with us:

Jewelry Display from a Picture Frame

Jewelry Display Board: 

Supplies:
- Fabric
- Frame
- Spray Paint
- Cotton batting
- Straight Pins
- Pearl Pins
- Duct or heavy duty tape 
- Double sided tape or glue dots

1. Pick a frame large enough to display your jewelry, hair bows, etc, and make sure the fabric you use extends at least 2 inches on each side.
2. Remove glass, frame backing and spray paint the frame the color of choice
3. Adhere cotton batting to the card board back of your frame. I use either glue dots or double sided tape, cutting off any excess batting.
4. Tautly pull the fabric over your frame backing and secure with either duct tape or framing tape (some people even like to use a heavy duty stapler)
5. Put newly covered frame cardboard back in the frame without the glass.
Done!

See Karen and Kathy in action on The Broadcast!

Monday, May 5, 2014

Save the date: Etsy Craft Party 2014

We are happy to announce our location for the annual Etsy Craft Party is City Craft. The theme this year is all about taking your photographs to new artistic levels. It's BYOP (bring your own photos) but we will have extra photographs for your use, if you don't have prints on hand.


You don't want to miss this little shindig. It's 7 to 9 p.m. on June 6. You can RSVP now for Etsy Craft Party 2014: Recapture. Enjoy an evening of food, drinks and crafty fun. We can't wait to see what you create.

Thursday, September 12, 2013

DIY Herb Wreath Tutorial

This morning Regina from Regal Cottage joined Suzy with D the Broadcast to talk about harvesting Fall herbs and making them into a lovely kitchen wreath. This is a great project to store and use your herbs long after you have pruned them back for winter. The herbs will dry on the wreath and you can snip off only what you need for recipes.

Here is the step by step process to making your own.


Step 1: Choose your frame. Pictured here is a lowly coat hanger destined for greatness! I shaped into a circle (sort of). Once the herbs are on, it fills out nicely, so don't worry too much about this. On the show we made two other versions, one used a grapevine wreath and the other an embroidery hoop. The grapevine wreath is best if you don't have tons of herbs to fill it out. You can just place them around the vines, and it looks great without a lot of herbs. 

Step 2: Cut off lengths of herbs in 9-12 inch sections. Bundle several stems together with floral wire. You will need probably 20 or so of these bundles depending on your frame and type of herbs. Our rosemary bushes had become overgrown and it was time to give them a good pruning, so that is what I chose to be the base for this wreath.

Step 3: You want to cover your entire frame. Attach two bundles at once. I used one on the front and one on the back to make sure that the wreath has a nice fullness and the wire doesn't show through.

Step 4: Layer your bundles on the frame to complete the entire circle. 

Step 4: Add in additional herbs strategically around the wreath. Pictured here is fresh basil on top of the rosemary base. You can add to your wreath as you wish. If you wind up later needing to purchase herbs for a recipe, just attach the leftovers to your wreath for later use. The more the better, and they will never go to waste.

Step 5: Finally attach a ribbon hanger. The ribbon I used in this picture is an indoor outdoor material that didn't tie well, so I stapled it together and put the staples to the back.

We would love to see your herb wreaths! Feel free to share them here in the comments, on Instagram (tag @etsydallas), Facebook or Twitter.

Happy crafting!

Tuesday, August 27, 2013

DIY Hair Clips by Holly: All the Deets!

Here are all the details for the DIY hair clips that Holly and her adorable daughter shared this morning on D: The Broadcast.


If you missed the show, you can catch it here.


Keep it crafty, friends!


Sunday, December 9, 2012

Craft Blast from the Past: Puffy Paint Candleholder

Welcome to Craft Blast from the Past, brought to you by Esther from estieMade! When I think of craft supplies from my childhood, puffy paint seems like a staple. I remember making many puffy painted shirts from when I was young and even up to my high school days (for volleyball team spirit). I'm no longer glamming up my shirts with puffy paint, but I'd like to show you how an easy way to use it to make holiday candleholders. It's a fun way to dress up table settings during Christmas!

Materials -small jar (I used a mason jar) -puff paint -Ribbon -battery-powered tealight Steps Take your puffy paint and paint on a design. I found the paint came out most evenly when I squeezed the bottle gently. My mason jars already had X's all along the middle, so I just painted on top of these in different colors. I I alternated between a sparkly gold puff paint and a white one, and ended up with this design. Once you're done with your design, let the paint dry, then cut out a length of ribbon that fits inside your jar. You can glue the ends together if you'd like. Place your battery-powered tealight in the jar, and turn it on. Now admire your new candleholder! Hope you enjoyed this Craft Blast from the Past. Good luck with prepping for the Holidays!

Wednesday, November 7, 2012

Craft Blast from the Past: Washi Tape Magnets

Esther from estieMade bring us another installment in her awesome Craft Blast from the Past series.


Craft Blast from the Past is back! We're focusing on DIY magnets today. Remember making magnets when you were young? It usually involved gluing circular magnets to some kind of art piece we made, or using magnetic tape on the back of a photo. Today I'm going to teach you to make your own with washi tape and magnetic business cards. It's a quick and easy way to spruce up your fridge or office filing cabinet. I got the inspiration from this tutorial.


Materials
-washi tape
-business card magnets 
-cardstock 
-scissors


Steps
Peel the plastic covering off the magnets to expose the sticky side. 

Place the magnet onto the cardstock and press down firmly. Make sure there are no air bubbles between the magnet and cardstock. Then trim off the excess paper.

Place the washi tape parallel to one of the edges of the business card, then use your scissors and cut along the tape line. Lastly, cut the edges of the magnet. You can either do straight cuts, or you can cut zig zags to mimic the torn edges of washi tape.

Since washi tape is so thin, I thought it'd be fun make a couple magnets with colored paper underneath the tape instead of plain white cardstock. I used sheets from a paper sample book I had at home. (If you're in Texas, you can get these books free from Clampitt for free.)

Since I used pastels, the color underneath came out pretty subtle. I like how it adds just a hint of color to the magnet though. 

Like I said, this is a super-quick project. What will you use your washi tape magnets for?

Wednesday, October 17, 2012

Adorable DIY Halloween Treats


Trick-or-treat time is almost here! This fun DIY project from Rori of MadeByRori might just make your house the most popular in the neighborhood with all the ghouls and goblins. 


Here are the supplies you will need: the cardboard from toilet paper rolls (you can also cut paper towel rolls to size, if needed); scissors; scrap paper in Halloween colors; scrap pieces of ribbon or twine; candy; double-stick tape; cellophane.

How to make these awesome Halloween treats:

1.   Cut scrap paper to 6 x 4 1/8 inches to fit the toilet paper roll. You may have some excess outside the edge of the roll, but that’s okay.
2.   Put double-stick tape around each end of the toilet paper tube and around the middle. Carefully wrap the tube with the paper. You’ll have about an inch of overlap, so add an extra strip inside the end of your paper for extra hold.
3.   Now center the wrapped tube in a piece of cellophane. I cut the cellophane into pieces of 13 x 8.5 inches. You want to roll along the 8.5-inch length, so there’s plenty left on either side. Use a small piece of double-stick tape to secure the cellophane to itself when you reach the end.
4.   Tie off one end of the cellophane with ribbon or twine (about 6.5 inches should be enough for one end), leaving the other end open so you can put in a few pieces of candy. Fun!
5.   Tie off the other end and you’re done!
6.   Put your adorable treats in a bowl and get ready to impress the neighbors.


These also make fun party takeaways. And they’re a good way to spice up the office candy bowl. 

Tuesday, July 3, 2012

Craft Blast from the Past: Sculpey Doily Bowls

Hello! it's Esther from estieMade, with the third installment of Craft Blast from the Past. This series is all about taking an old school craft and using it in a new and modern way.

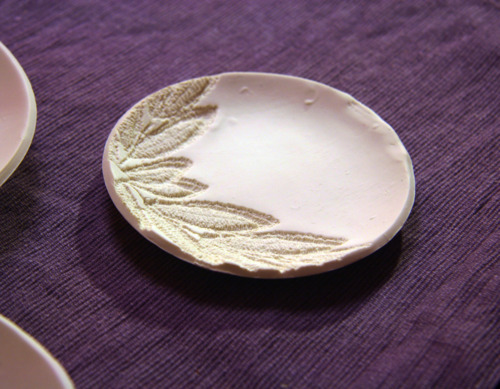
Today, we focus on Sculpey. It's a bake-able polymer clay that you can buy at your local craft store. Some of y'all may have used this to make your own beads for necklaces growing up. Or maybe you made a 'plate' with an imprint of your hand on it to give to your Mom for Mother's Day in second grade. Fast forward a bunch of years, and this is what you can do with Sculpey now: make a little bowl for your jewelry. The inspiration for this came from this tutorial from Sodapop design. It’s in German, but the pics are pretty self explanatory. I translated the text using Google translator, and came up with this adapted tutorial. To start, I gathered my materials: bowling3-Sculpey clay (I got this at JoAnn Fabrics)
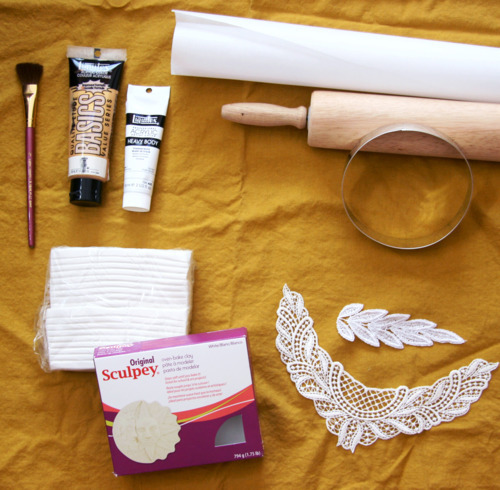
-lace to make your design (a paper doily works fine too)
-a cookie cutter (a cup works fine too)
-rolling pin
-either wax paper or a silipat to roll the clay on
-acrylic paint (optional)

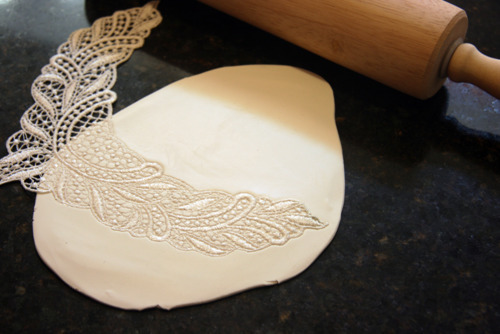
Steps First, roll out the Sculpey onto the Silipat (or wax paper). Make sure you roll the clay out evenly, so that the entire piece is the same depth (about .25"). (By the way, don’t roll your clay out directly on the counter, or you will have to restart. I made that mistake, and couldn’t scrape the clay off the counter without ruining the design.) bowling4
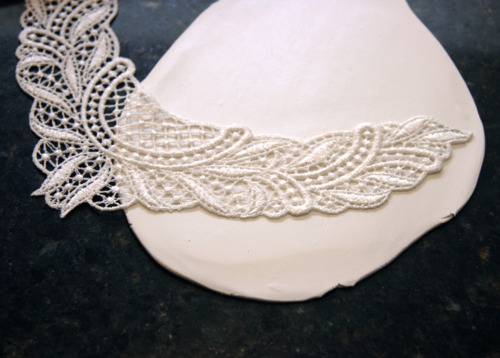
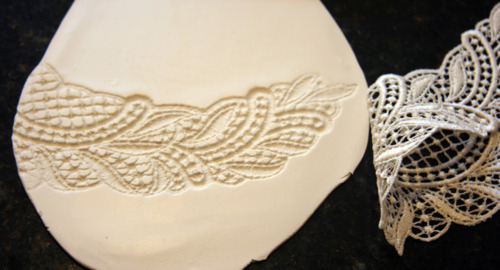
 Then roll the lace into the clay. bowling5
 Carefully peel back the lace. bowling6
 Use your cookie cutter to cut the clay into a circle. bowling7
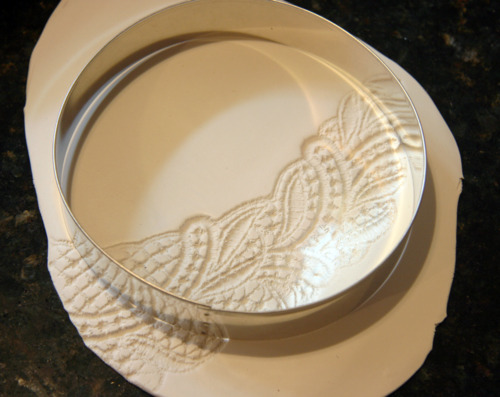
Next, peel the clay circle off the Silipat, and put it into a oven-safe bowl. I didn’t want the finished bowl to be too deep, so I used a shallow one. bowling 11
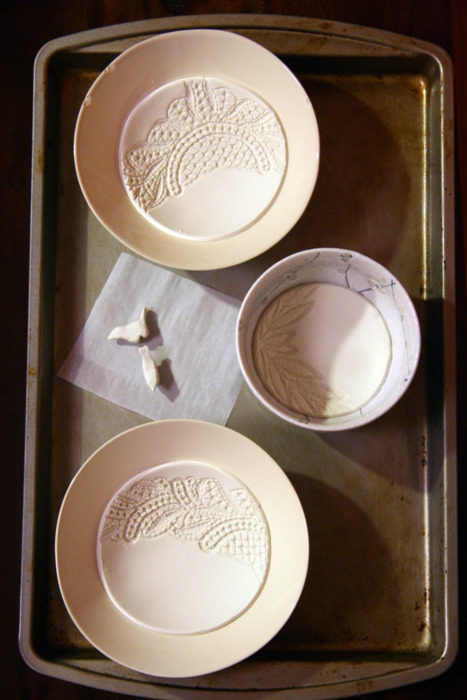
The oven-safe bowls went on a cookiesheet, and were baked. I just followed the baking instructions on the Sculpey packaging. After they were done baking, Let the clay cool in the bowls. bowling12
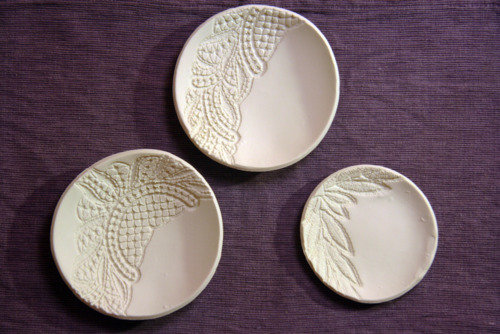
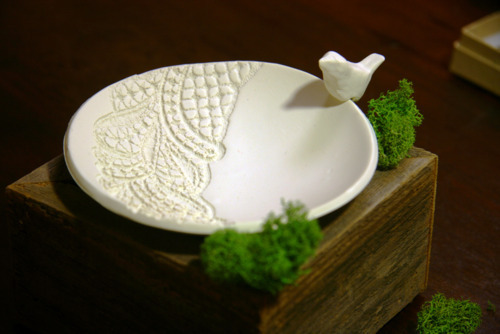
Now for the finishing touches. I ended up making a little birdie to perch on the lip of one of the bowls. To make it easier to glue the bird to the bowl, I cut out a little triangle of clay from the bottom of the bird. This was baked standing up, at the same time as the bowls. bowling9
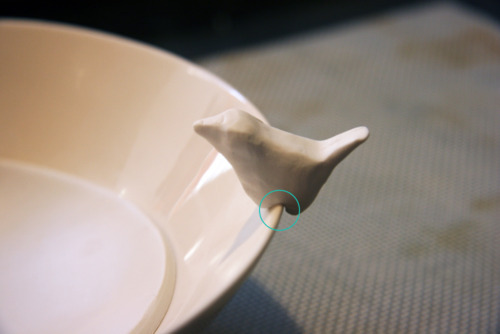
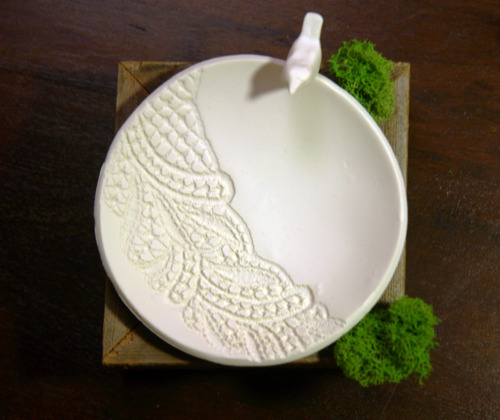
I attached the little bird I made to the lip of one clay bowl.bowling1 bowling13
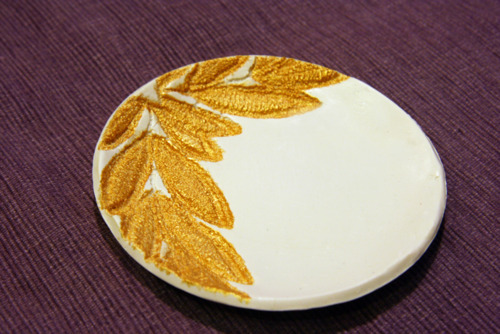
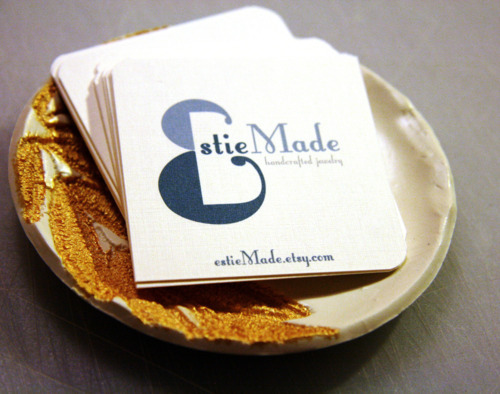
On another bowl, painted it with two coats of gold acrylic. Had to use a small brush to do this, for more precise painting. bowling14 bowling15
I ended up using this as my business card holder at last year's Handmade Bash. bowling16
These bowls are pretty versatile – and they look pretty good, for being made out of Sculpey!
Related Posts with Thumbnails