COMMENTS ARE CLOSED
Thanks to all who entered the contest! Congrats to our winner, Dana!

When it came time to decorate for our
Jingle Bash, the Deco Squad planners (Cheyne, Laura and Larry) really wanted to echo the theme created in our gorgeous event fliers, by our own Christina of
paperfingers. We decided to make a very simple felt garland that played on her beautiful leafy design. We ended up liking the garland so much that we wanted to share how to make it! It's seriously quick, inexpensive, and very versatile.
Not crafty yourself? Skip to the bottom to find out how you can win the tutorial example - a 12 foot handmade garland the perfect length to decorate a doorway or mantle!
 You'll need:
- felt*
- scissors
- thread to match your most frequently occurring felt color
- sewing machin
- holiday music playlist worthy of your awesomeness. (Wham!'s "
Last Christmas" on repeat is clearly your only option.)
- hot chocolate or coffee. (It works like magic, trust me.)
* We approximate the felt turns into at least 6 feet of garland per half yard of 36" wide felt on the bolt. So if you'd like at least 18 feet, buy 1.5 yards total. This is approximate and will vary on the leaf size, the spacing when sewn together, and how conservatively you lay out your leafs for cutting.STEP 1
Choose your garland color scheme and gather your supplies. The Deco Squad chose the colors to match our Jingle Bash artwork. I'd love to do a gorgeous aqua and silver/grey garland!
STEP 2
Turn up "Last Christmas" on high volume, get that hot chocolate close to you, find a table to get to cutting. This step is clearly very important.

STEP 3
Cut your felt into nice little leaves. We made the ones for the Jingle Bash fairly large because we need to cover larger areas. I made my example leaves about 3 inches long. If you're not comfortable with a trial and error approach of cutting directly on the felt, draw out some leaves on paper and hold/pin the paper to the felt and cut around your drawn shape. After you've found the shape and size you like, it's easy to hold the original leaf onto the felt and cut replicas. Don't like our shape or need to print out a template?
Click here to help you find something you like.
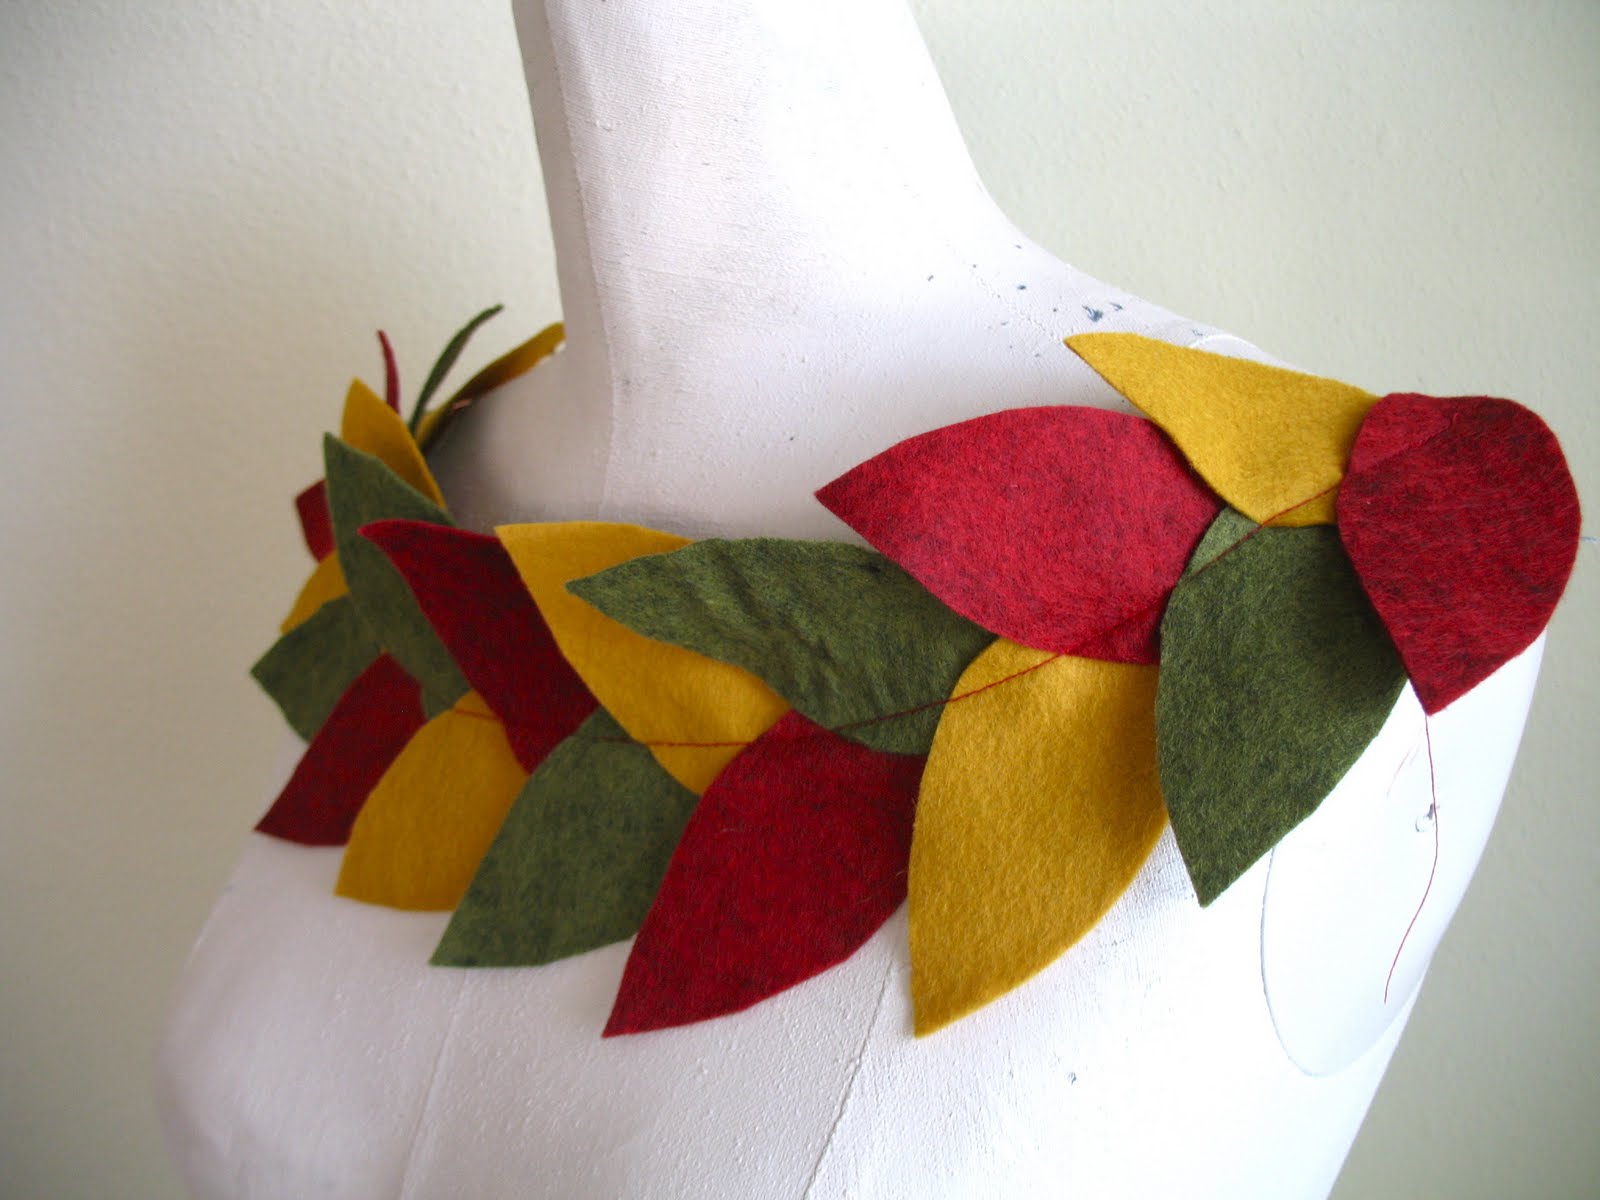
 STEP 4
I chose three colors for the example garland so the colors would alternate well.
Tip: You can pin your leaves to each other or on to a tracing paper backing if you aren't comfortable with placing them as you sew. Just rip the tracing paper off after it's sewn together. I chose to skip this step because I found it was easier to play with the placement as I sewed.

You should be able to keep a straight stitch down the middle of the garland, catching the bottom/side of each leaf as you sew down. If you chose not to pin your leaves together, just add each leaf as you sew, paying attention to placement. Here's a tiny video of how that's done:
Tip: You may find that stitching in a curve back and forth catches more of each leaf and make a more structured garland. Be prepared to play with it a bit! And don't be completely scared of the seam ripper if you don't like your first try!
Warning! This requires your hands to be very close to the needle. Please be aware of where your hands are. I've sewn through my fingernail (not with this project). I don't recommend it. It doesn't leave a cool war wound, it's mainly just painful and scary.
 STEP 6
, on your tree, or in the doorway. Pretty!
 Put your own spin on it!
 Sew some ribbon on the end to tie to things, sew a short version with ribbon ends and make a grecian headband, choose super high quality wool felt and make a scarf! Show us what you make!

Or skip all that and comment on this blog post to win our leafy garland. Include your email address and we'll pick a winner at random to receive our sample garland in the mail in time for Christmas!
Comments close Wednesday December 15th at midnight. Reblog and link in the comments for a second entry! US residents only, please!
Posted by Cheyne of CutOutAndCollect And please no judgments on my musical taste.


 Shoestrings and kerchiefs never looked so cute.
 A pair of baby socks look like mini-stockings. Gimme gimme.
 A sweet collection of gift wrap ideas by Greg Likes Weddings.
 Potato stamps, marbling and googly eyes, I would expect nothing less from UO.