Showing posts with label how to. Show all posts

Saturday, March 26, 2016

How to Make a Linocut Block by Wandering Paper Co.


Allow me to introduce you to Alex George, new Etsy Dallas member, and creative spark behind the eclectic, multicultural inspired prints and cards at Wandering Paper Co.  

She has thoughtfully prepared a linocut and block printing tutorial, and has given me permission to share.  Enjoy and check out her vibrant shop and blog!

Materials:Speedball Speedy-Carve block, size 4x6"Hard Rubber Brayer Pencil & Paper Adobe Illustrator (optional), Speedball Linoleum Cutter & Assorted Attachments

First, measure a 4x6 rectangle on a sheet of paper.  You can do this quickly by tracing your 4x6 block.

trace a 4x6 rectangle

Sketch out your design in pencil first. After I sketch my design out, I usually scan the drawing and fine-tune it in Adobe Illustrator. If you don't have Illustrator, don't worry, this part is optional.
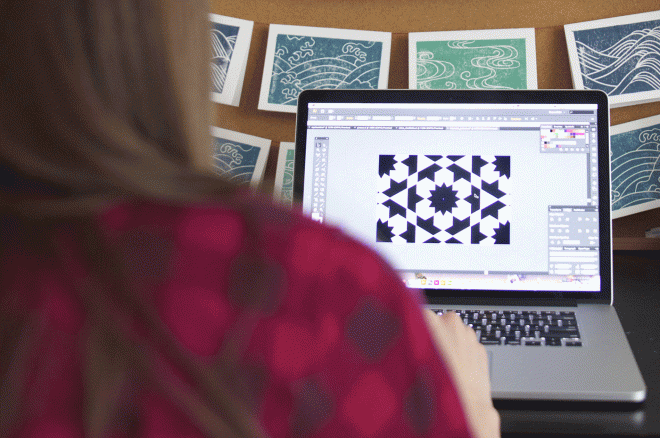
use Adobe Illustrator to fine-tune your sketch

If you do design your print on the computer, print it out and color in the negative space with pencil. If you sketched your print out by hand, you can skip this step.
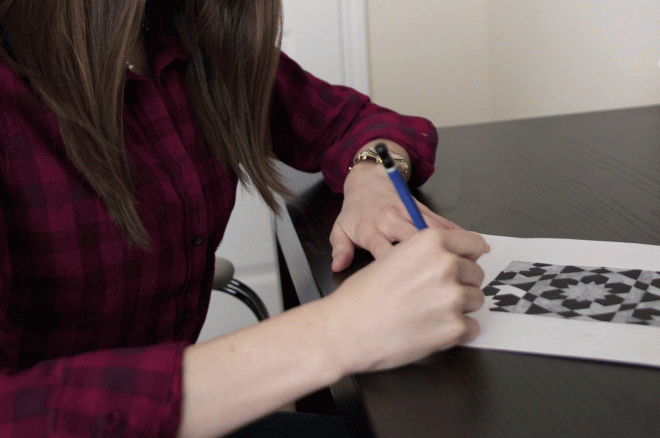
color the negative space on your design in with pencil

Now you will transfer your pencil sketch to the rubber block. Carefully lay your rubber block over your sketch so the edges align. Use your hard rubber brayer (or your fingers) to press down on the rubber block so the graphite from the pencil transfers from the paper onto the block.
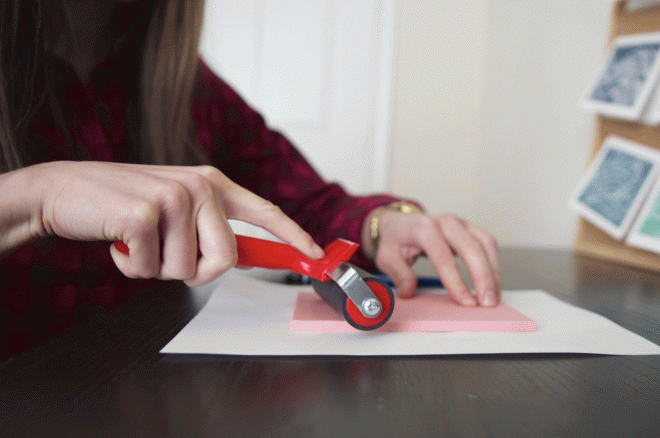
use a brayer to transfer your design

Lift up the block and use your pencil to touch up any areas where the graphite did not transfer.Now use your linoleum cutter to carve your design out of the block. A few tips: Use the tool in a pushing (not pulling motion) for best results. Also, turn the block, not your hand when making a curved line.
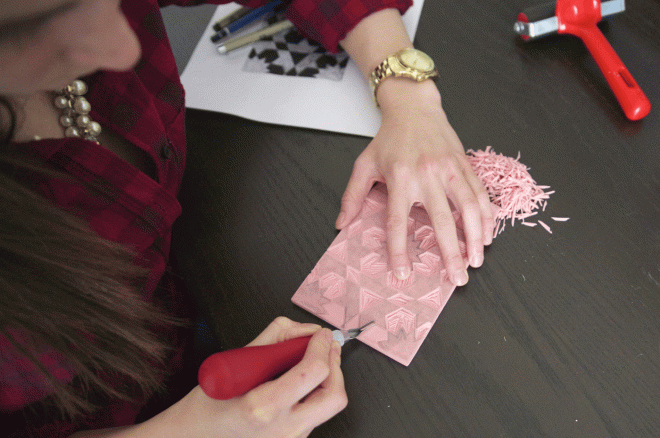
carve your block using linoleum cutters

Voila! Your block is carved, and you're ready to print! 


finished linocut block


Thank you so much for sharing your art with us, Alexandra!  Hop on over to her beautiful blog to see how to use your carved linocut block to print in Part 2 of her series!  Happy Saturday, friends and crafters!

Tuesday, June 3, 2014

How to set up a craft show booth like a pro (part two)

Do you ever wonder what goes into prepping for those craft shows you visit? Have you been thinking about selling your work? We asked Jenny and Sabrina of The Pig and The Peacock for their expert advice on being a vendor. And they delivered! Check out their earlier post if you haven't already …


Prep for Doing Business
One or two weeks before the show, gather everything you need to do business and ring up transactions. Pens, calculators, invoice/receipt books, shopping bags, are must-haves.

Make a bank run to get change – think about your price points and plan your change based on that. If you take credit card payments via Square or any other device or app, make sure they are in working order and that you remember passwords for apps. Another thing we do is create a cheat sheet of all of our items pricing with tax. At the bottom we have every price point from $1-$100 with tax added for quick reference.

Prepare for the Day
Bring bottled water or soda and snacks even if there will be food/drinks on site. You may be too busy to take a break! Be sure to snack when you can so you don't run out of energy toward the end of the day. It's also great if you can recruit friends to help, whether it is to drop off lunch, give you a break or support.

Prepare for the Unexpected
Know that no matter how much planning you do, you can't plan for everything, but you can try your best to be prepared so if the unexpected does happen, you have it covered. We always bring a disaster kit. In this kit, along with our pens and invoice books, we keep the following:
  • Stapler
  • Scotch tape
  • Duct tape 
  • Packing tape (no joke we bring 3 kinds of tape with us and have used them all!)
  • Kleenex and napkins
  • Safety pins
  • Advil (you will be glad you had it)
  • Calculator
  • A multi-use tool
  • Lighter
  • Power strip
  • Extension cords
  • Bungee cords
  • Band-Aids
  • Purell
  • Sharpies
  • Blank index cards (for ad-hoc signage)
  • Business cards
  • Notebook – we like to take notes of things we forgot or wish we had and items customers asked for that we currently don't make
  • We also bring a hand truck and a thick floor mat to stand on

Have Fun Selling
The best part of being at a craft show is being able to talk with your shoppers, and tell them about your process and your passion for your craft. Have fun selling and they will have fun shopping.

If you are on the shy side, think about an opening line to break the ice – perhaps something that makes your items special or what inspired you to make it. Instead of answering questions with a yes or no, take advantage of the opportunity to tell people more about the item too. Even a simple hi and a smile will go a long way to make people feel welcome. We like to chat with people and ask them how they are enjoying the event as a whole, and find out what cool things they have seen at other booths. 

How to set up a craft show booth like a pro (part one)


Do you ever wonder what goes into prepping for those craft shows you visit? Have you been thinking about selling your work? We asked Jenny and Sabrina of The Pig and The Peacock for their expert advice on being a vendor. And they delivered! Check back soon for part two …

https://www.flickr.com/photos/edpresspics/14061342030/

Craft shows are a great opportunity to boost sales and meet your customers face to face so you can show them what you are all about. In order for you and your shoppers to have the best experience possible, you need to plan ahead and prepare.

Make Enough Product
First and foremost you need product – and plenty of it. You should aim to still have a relatively full display toward the end of the show. If your booth looks empty, you might get passed by. Depending on your price points, you should expect to sell 1/4 to 1/3 of the inventory you bring. The best way to be prepared is to make a production schedule and try to stick to it. Then bring everything to the show, even if you aren't sure you will sell it.

Lay Out Your Booth Space and Displays
About three weeks before the show, plan your booth space. Decide what your table layout will be, how your displays will be set up and where chairs and product storage will go but still be easily accessible. Tape off the booth space on the floor or driveway and be sure everything fits. Once you have a "floor plan," decide how your goods will be displayed.

You want to be sure your displays hold enough product, are easily shop-able, and add height and interest to your booth. Anything can be used as a display, from old crates and quirky vintage suitcases to simple metal hanging racks or risers. Bring tablecloths for your tables to create a visually appealing display that allows you to hide stuff under the table. Remember to consider lighting needs. Check out this Flickr Craft Show Group for ideas.

Create Signage
On average, a customer will ask the price of items only twice before they feel uncomfortable asking again. Put them at ease by creating signage or putting price tags on all of your items. Make sure the sign is easy for them to spot and big enough to read from a distance. Also be sure you have business cards handy and in a place that is easy for shoppers to find. 
Related Posts with Thumbnails